参考链接:
https://floodli.github.io/2017/01/12/%E5%85%8D%E8%B6%8A%E7%8B%B1%E7%89%88iOS%E6%8A%A2%E7%BA%A2%E5%8C%85%E6%8F%92%E4%BB%B6/
http://iosre.com/t/ios/6119
https://github.com/theos/theos/wiki/Installation
https://floodli.github.io/2017/01/12/%E5%85%8D%E8%B6%8A%E7%8B%B1%E7%89%88iOS%E6%8A%A2%E7%BA%A2%E5%8C%85%E6%8F%92%E4%BB%B6/
http://iosre.com/t/ios/6119
https://github.com/theos/theos/wiki/Installation
最近在看《iOS应用逆向工程》这本书,就在github上找了些关于免越狱微信抢红包的资料,结合着各位大神的教程,于是就开始了一步步尝试,此篇主要的目的是为了防止自己忘记。
原理
虽然这里并不深入讲解,但是最基本的原理我们还是要理解的,因为后面所做的工作,都是基于这个原理来进行开发的。越狱机器之所以能使用 tweak,主要是因为在越狱的时候,手机里就安装了 mobilesubstrate 这个库,这个库的作用就是能在程序运行的时候动态加载我们自己写的 dylib 动态运行库。而由于非越狱手机系统里面是没有这个库的,所以我们需要直接将这个库打包进 ipa 当中,使用它的 API 实现注入。
关于注入的原理,可以参考这篇文章:移动App入侵与逆向破解技术-iOS篇。
获取砸壳版本的微信 IPA
因为在 AppStore 上面下载得到的应用都是经过加密的,可以执行文件上已经被加过一层壳,所以我们需要先拿到砸过壳版本的微信应用。
有两种方法:
- 直接在爱思助手下载
- 使用 Clutch 对越狱手机上应用进行砸壳
由于手上没有越狱的设备,于是选择了第一种,在爱思助手上下载了微信6.5.3版本。(尝试过使用pp助手下载越狱版微信,但是发现还是被加密了)
确认app是否加密
第一步,解压获得二进制文件,并查看包含的架构
第一步,解压获得二进制文件,并查看包含的架构
1 2 3 4 5 6 7 | $ unzip WeChat.ipa -d wechat ... $ cd wechat/Payload/WeChat.app/ $ file Wechat Wechat: Mach-O universal binary with 2 architectures Wechat (for architecture armv7): Mach-O executable arm Wechat (for architecture arm64): Mach-O 64-bit executable |
第二步,通过 otool -l 输出 app load commands ,然后查看 cryptid 标志位的值是否为 0(0表示未加密,1表示已加密)
1 2 3 4 5 6 7 | $ otool -l Wechat | grep crypt cryptoff 16384 cryptsize 38748160 cryptid 0 cryptoff 16384 cryptsize 41467904 cryptid 0 |
准备 DYLIB 动态链接库
转载注:需先按照这篇文章安装theos。
这步就很简单了,我选择到buginux的WeChatRedEnvelop上把源码 clone 下来,然后执行 make 命令,就能拿到 dylib 文件了。
1 2 3 4 5 6 7 8 9 10 | $ git clone https://github.com/buginux/WeChatRedEnvelop.git $ cd WeChatRedEnvelop $ make # > Making all for tweak WeChatRedEnvelop… # ==> Preprocessing Tweak.xm… # ==> Compiling Tweak.xm (armv7)… # ==> Compiling XGPayingViewController.m (armv7)… # ... # ==> Signing WeChatRedEnvelop… $ cp .theos/obj/debug/WeChatRedEnvelop.dylib ~/Desktop # 注意是 .theos 目录,这是个隐藏目录 |
将生成的 dylib 文件拷贝到桌面,跟刚刚砸过壳的微信应用放到一个目录层级。
检查依赖项
使用 macOS 自带的 otool 工具就可以进行依赖项检查:
1 2 3 4 5 6 7 8 9 10 11 12 13 14 15 16 17 18 19 | $ otool -L WeChatRedEnvelop.dylib WeChatRedEnvelop.dylib (architecture armv7): /Library/MobileSubstrate/DynamicLibraries/WeChatRedEnvelop.dylib (compatibility version 0.0.0, current version 0.0.0) /usr/lib/libobjc.A.dylib (compatibility version 1.0.0, current version 228.0.0) /System/Library/Frameworks/Foundation.framework/Foundation (compatibility version 300.0.0, current version 1349.1.0) /System/Library/Frameworks/CoreFoundation.framework/CoreFoundation (compatibility version 150.0.0, current version 1348.0.0) /System/Library/Frameworks/UIKit.framework/UIKit (compatibility version 1.0.0, current version 3600.5.2) /usr/lib/libsubstrate.dylib (compatibility version 0.0.0, current version 0.0.0) /usr/lib/libc++.1.dylib (compatibility version 1.0.0, current version 307.4.0) /usr/lib/libSystem.B.dylib (compatibility version 1.0.0, current version 1238.0.0) WeChatRedEnvelop.dylib (architecture arm64): /Library/MobileSubstrate/DynamicLibraries/WeChatRedEnvelop.dylib (compatibility version 0.0.0, current version 0.0.0) /usr/lib/libobjc.A.dylib (compatibility version 1.0.0, current version 228.0.0) /System/Library/Frameworks/Foundation.framework/Foundation (compatibility version 300.0.0, current version 1349.1.0) /System/Library/Frameworks/CoreFoundation.framework/CoreFoundation (compatibility version 150.0.0, current version 1348.0.0) /System/Library/Frameworks/UIKit.framework/UIKit (compatibility version 1.0.0, current version 3600.5.2) /usr/lib/libsubstrate.dylib (compatibility version 0.0.0, current version 0.0.0) /usr/lib/libc++.1.dylib (compatibility version 1.0.0, current version 307.4.0) /usr/lib/libSystem.B.dylib (compatibility version 1.0.0, current version 1238.0.0) |
可以看到除了 substrate 库,其它依赖的都是系统自带的库。我们将 libsubstrate.dylib 拷出,使用 install_name_tool 命令修改动态库的路径,指向 app 二进制文件的同级目录。
1 2 3 4 | 如果你的系统中不是 /usr/lib/libsubstrate.dylib 而是 /Library/Frameworks/CydiaSubstrate.framework/CydiaSubstrate的话 下载链接: https://pan.baidu.com/s/1qXBqHSo 密码: efvy 转载注:上面的下载链接已经失效,可以使用这个链接下载。 然后执行: $ install_name_tool -change /Library/Frameworks/CydiaSubstrate.framework/CydiaSubstrate @loader_path/libsubstrate.dylib WeChatRedEnvelop.dylib |
可以看到 libsubstrate.dylib 的路径已经变更了。
1 2 3 4 5 6 7 8 9 10 11 12 13 14 15 16 17 18 19 20 21 | $ scp root@<your.device.ip>:/usr/lib/libsubstrate.dylib ~/Desktop $ install_name_tool -change /Library/Frameworks/CydiaSubstrate.framework/CydiaSubstrate @loader_path/libsubstrate.dylib WeChatRedEnvelop.dylib $ otool -L WeChatRedEnvelop.dylib WeChatRedEnvelop.dylib (architecture armv7): /Library/MobileSubstrate/DynamicLibraries/WeChatRedEnvelop.dylib (compatibility version 0.0.0, current version 0.0.0) /usr/lib/libobjc.A.dylib (compatibility version 1.0.0, current version 228.0.0) /System/Library/Frameworks/Foundation.framework/Foundation (compatibility version 300.0.0, current version 1349.1.0) /System/Library/Frameworks/CoreFoundation.framework/CoreFoundation (compatibility version 150.0.0, current version 1348.0.0) /System/Library/Frameworks/UIKit.framework/UIKit (compatibility version 1.0.0, current version 3600.5.2) @loader_path/libsubstrate.dylib (compatibility version 0.0.0, current version 0.0.0) /usr/lib/libc++.1.dylib (compatibility version 1.0.0, current version 307.4.0) /usr/lib/libSystem.B.dylib (compatibility version 1.0.0, current version 1238.0.0) WeChatRedEnvelop.dylib (architecture arm64): /Library/MobileSubstrate/DynamicLibraries/WeChatRedEnvelop.dylib (compatibility version 0.0.0, current version 0.0.0) /usr/lib/libobjc.A.dylib (compatibility version 1.0.0, current version 228.0.0) /System/Library/Frameworks/Foundation.framework/Foundation (compatibility version 300.0.0, current version 1349.1.0) /System/Library/Frameworks/CoreFoundation.framework/CoreFoundation (compatibility version 150.0.0, current version 1348.0.0) /System/Library/Frameworks/UIKit.framework/UIKit (compatibility version 1.0.0, current version 3600.5.2) @loader_path/libsubstrate.dylib (compatibility version 0.0.0, current version 0.0.0) /usr/lib/libc++.1.dylib (compatibility version 1.0.0, current version 307.4.0) /usr/lib/libSystem.B.dylib (compatibility version 1.0.0, current version 1238.0.0) |
将动态链接库注入二进制文件中
接下来,就需要将我们的库注入到微信的二进制文件中,可以使用开源的 optool 工具。
编译安装 optool 工具:
编译安装 optool 工具:
1 2 3 | $ git clone --recursive https://github.com/alexzielenski/optool.git $ cd optool $ xcodebuild -project optool.xcodeproj -configuration Release ARCHS="i386 x86_64" build |
将砸壳过的 ipa 文件解压,然后将 libsubstrate.dylib 与 WeChatRedEnvelop.dylib 拷贝到解压后的 WeChat.app 目录下。
1 2 3 | $ cd ~/Desktop $ unzip wechat.ipa -d wechat $ cp libsubstrate.dylib WeChatRedEnvelop.dylib wechat/Payload/WeChat.app |
使用 optool 把 WeChatRedEnvelop.dylib 注入到二进制文件中:
1
| $ /path/to/optool install -c load -p "@executable_path/WeChatRedEnvelop.dylib" -t wechat/Payload/WeChat.app/WeChat
|
在开始打包之前,请先将 WeChat.app 里面的 Watch 目录删除,这个目录是跟 Watch 有关的,如果不删除的话,会导致后继的安装步骤出问题。出现 A WatchKit app within this app is not a valid bundle 的错误。
打包并重签名
打包 ipa 与重签名可以直接使用图形化工具 ios-app-signer 来完成。
这个工具可以自动加载出本机的证书以及 Provisioning Profile 文件,使用起来十分方便,当然也可以手动选择证书文件。
如果是使用个人开发者证书,需要先将设备的 UUID 加到 Provisioning Profile 中。
如果是使用个人开发者证书,需要先将设备的 UUID 加到 Provisioning Profile 中。
1
| 如果是使用个人开发者证书,需要先将设备的 UUID 加到 Provisioning Profile 中。
|
我这里是直接从一个 archive 过的应用中提取 embedded.mobileprovision 文件,并在 Provisioning Profile 一栏中选择 Choose Custom File 使用这个文件。
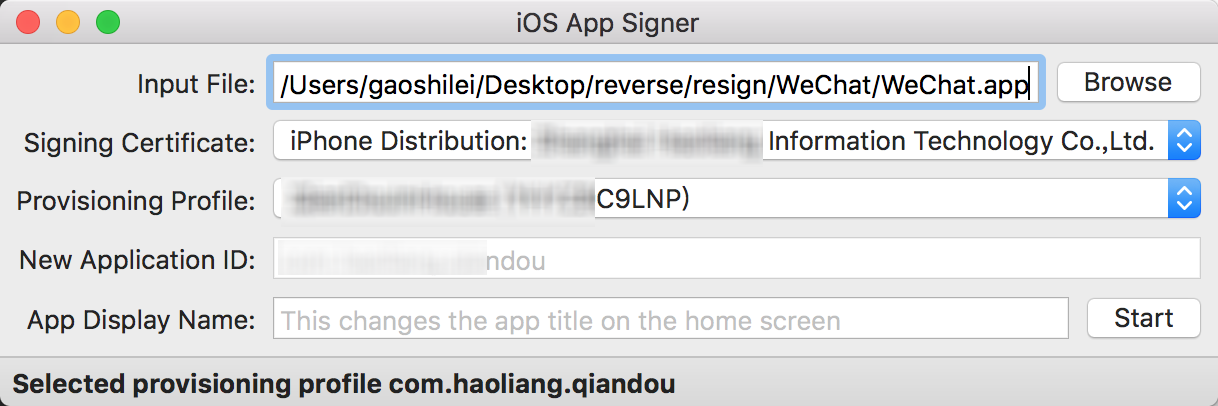
点击 start 后,指定保存路径,iOS App Signer 就会帮你搞定所有事情。
点击 start 后,指定保存路径,iOS App Signer 就会帮你搞定所有事情。
安装
安装ideviceinstaller
1
| 安装ipa包用的,也可以通过itool之类的工具,不过ideviceinstaller可以看到安装过程的过程,方便我们找到出错原因。
|
执行命令
1
| brew install ideviceinstaller
|
如果提示brew命令找不到,那就是你的Mac还没有安装Homebrew
常见的报错信息:
常见的报错信息:
1
| ERROR: Could not connect to lockdownd, error code -5
|
这个时候只要重新安装libimobiledevice就可以了(因为ideviceinstaller依赖很多其他插件)
执行下面的命令:
执行下面的命令:
1 2 | $ brew uninstall libimobiledevice $ brew install --HEAD libimobiledevice |
连上你的手机执行下面的命令查看ideviceinstaller是否连接上手机:
1
| $ ideviceinfo
|
如果打印出一大堆手机的信息表示连接成功可以安装ipa包,如果不成功请根据错误提示进行调整。执行下面的命令进行安装:
1 2 3 4 5 6 7 8 9 10 11 12 13 14 15 16 17 18 | $ ideviceinstaller -i WeChat.ipa WARNING: could not locate iTunesMetadata.plist in archive! WARNING: could not locate Payload/WeChat.app/SC_Info/WeChat.sinf in archive! Copying 'WeChat.ipa' to device... DONE. Installing 'com.xxxxxxxxxxxx' - CreatingStagingDirectory (5%) - ExtractingPackage (15%) - InspectingPackage (20%) - TakingInstallLock (20%) - PreflightingApplication (30%) - InstallingEmbeddedProfile (30%) - VerifyingApplication (40%) - CreatingContainer (50%) - InstallingApplication (60%) - PostflightingApplication (70%) - SandboxingApplication (80%) - GeneratingApplicationMap (90%) - Complete |
评论
发表评论